
Painting Tools
it19 :: Lessons :: Photoshop Lessons
Page 1 of 1

Painting Tools
![]() by Wingedge Sat Aug 09, 2008 11:00 pm
by Wingedge Sat Aug 09, 2008 11:00 pm
Pencil and Brush
Brush Tool
The brush tool paints with smooth edges. The options bar looks like this:

* Brush: The size of the brush.
* Mode: The blending mode. For most work Normal will be the best option. Experiment with other modes to see what they do.
* Opacity: Anything less than 100% will allow the underlying image to be seen.
* Flow: Determines how quickly paint is applied. Lower setting produces lighter strokes.
The Airbrush Tool

The airbrush option allows you to apply gradual tones to an image, like a traditional airbrush.
The Pencil Tool

The pencil tool behaves much like the brush except that it has hard edges. The pencil tool options are the same as the brush tool, except:
* There is no airbrush option.
* There is an Auto Erase option. This paints the background colour over areas containing the foreground colour.
Note: To draw a straight line, click a starting point in the image, then hold down the Shift key and click an ending point.
Eraser Tool

Photoshop's eraser tool can be found in the second group of icons in the toolbox. It has three variations: Eraser, Background Eraser and Magic Eraser.
The eraser is basically a brush which erases pixels as you drag it across the image. Pixels are erased to transparency, or the background colour if the layer is locked.
When you select the eraser tool, you have various options available in the toolbar:
Brush: Options include the size of the eraser, hardness of edges and various styles. Brush options are not available in block mode.
Mode: There are three options: brush (soft edges), pencil (hard edges) and block (square brush size).
Opacity: 100% opacity erases pixels completely, 0% does not erase at all. 50% is semi-transparent (or coloured). Opacity is not available in block mode.
Flow: Determines how quickly the erasure is applied by the brush. Lower settings produce a more subtle effect. Only available in brush mode.
Airbrush: Use the eraser as an airbrush. Only available in brush mode.
Erase to History: Erases to a saved state or snapshot of the image. To use this feature, click the left column in the history palette next to the desired state.
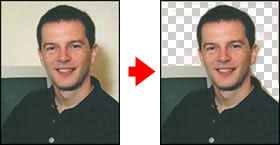
Background Eraser Tool

The background eraser tool allows you to remove the background colour from an image or layer. When you click the image, the eraser samples the colour at the centre of the brush and erases this colour as you drag. Options in the toolbar allow you to specify the type of erasure, colour tolerance and sampling method.
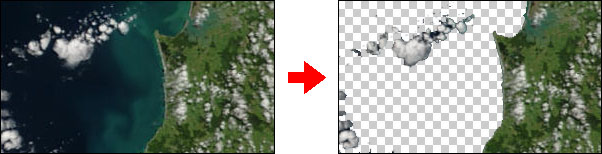
Magic Eraser Tool

The magic eraser tool erases all colours within a set tolerance. This is essentially the same as using the magic wand and hitting Delete. Using this tool you don't need to drag just click once.
Photoshop History Brush

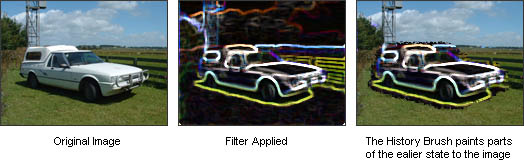
The history brush uses a previous state or snapshot of an image. The tool makes a copy of the image as it was in a previous state, then uses the content of this copy to paint with.
Example
The example on the bottom shows the history palette of an image. Three things have happened (i.e. there have been three states):
1. The image was opened.
2. The levels were adjusted.
3. A glowing edges filter was applied.
In the left column of this palette there is a selection box next to each state. Click a box to select that state. By default, the selected state is the point where the file was opened or created.
Painting with the history brush tool will add content from the earlier state like so:
Photoshop - The Brush Palette
The small icon located on the tool bar hardly does justice to the tool when compared to the actual brush palette. Access the brush palette located toward the top of the program. Single click the brush tab to activate the brush palette.
The palette is organized into a two column table with preset brushes on the right-hand side and several brush stroke options on the left. At the bottom lies a preview that should give you some idea of what your brush stroke will do. The brush palette is essentially the ultimate control panel for your brushes. Anything and everything can be adjusted with the brush palette.
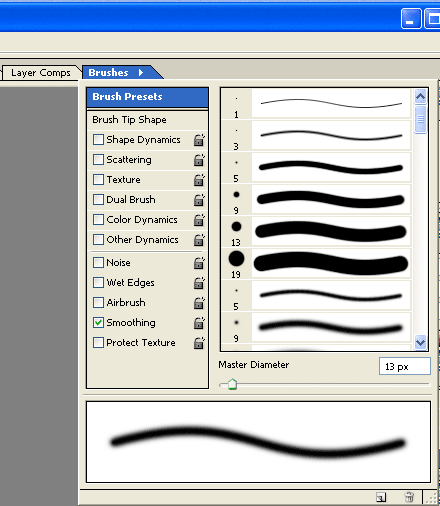
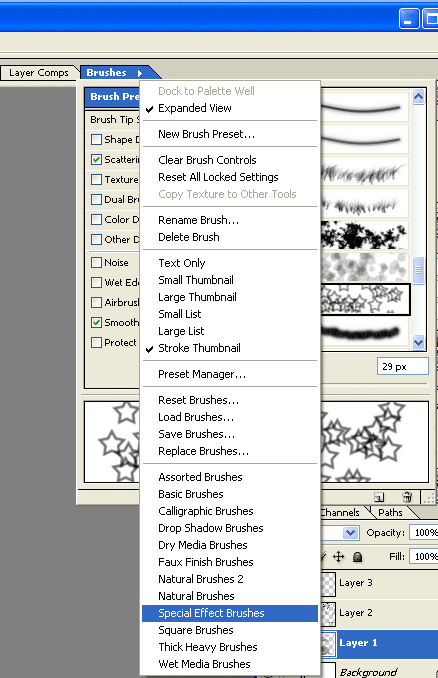
Photoshop comes with several brush pre-sets. Later we will discuss how to create your own unique brushes but for now scroll through the preset brushes and when you come to the bottom, there's still more hiding from your view. To access them, click on the little black arrow located at the top of the palette near the actual Brushes tab. A navigation list should pop into view and at the bottom of that list lies about a dozen brush sets.
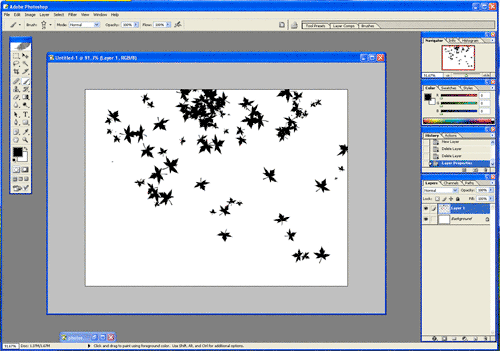
Browse through them, familiarize yourself with this palette, and finally pick a brush to paint with and paint away on a new layer.
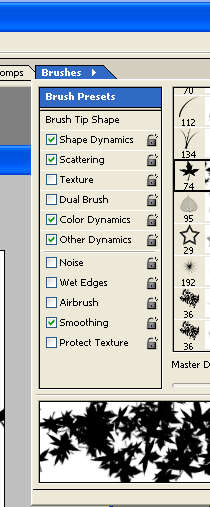
Previously we sort of ignored the left column of the brush palette. Customizing brushes is accomplished here. Simply checking one of the boxes here modifies the brush in some way. These options are a way to fine tune brushes and can really bring about some impressive results.
If the scatter option on your brush isn't already on, click the check box to activate this option and then click the text to highlight the option and bring the palette into fine-tune mode.
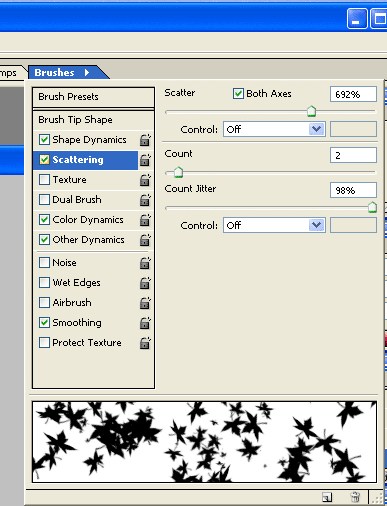
Here we can adjust the amount of scattering that takes place along with the jitter and fade options. All really neat features available through the brush palette.
Photoshop - Create Your Own Brush
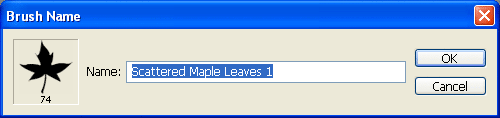
As you begin to "fiddle" around with each and every option available, you may want to save your brush as a preset for later use. Finalize all your options and settings then click the "Create New Brush" button at the bottom of the brush palette. Photoshop comes back with a prompt of what to name your brush. Type in a name and then press "OK".

Brush Tool
The brush tool paints with smooth edges. The options bar looks like this:
* Brush: The size of the brush.
* Mode: The blending mode. For most work Normal will be the best option. Experiment with other modes to see what they do.
* Opacity: Anything less than 100% will allow the underlying image to be seen.
* Flow: Determines how quickly paint is applied. Lower setting produces lighter strokes.
The Airbrush Tool
The airbrush option allows you to apply gradual tones to an image, like a traditional airbrush.
The Pencil Tool
The pencil tool behaves much like the brush except that it has hard edges. The pencil tool options are the same as the brush tool, except:
* There is no airbrush option.
* There is an Auto Erase option. This paints the background colour over areas containing the foreground colour.
Note: To draw a straight line, click a starting point in the image, then hold down the Shift key and click an ending point.
Eraser Tool
Photoshop's eraser tool can be found in the second group of icons in the toolbox. It has three variations: Eraser, Background Eraser and Magic Eraser.
The eraser is basically a brush which erases pixels as you drag it across the image. Pixels are erased to transparency, or the background colour if the layer is locked.
When you select the eraser tool, you have various options available in the toolbar:
Brush: Options include the size of the eraser, hardness of edges and various styles. Brush options are not available in block mode.
Mode: There are three options: brush (soft edges), pencil (hard edges) and block (square brush size).
Opacity: 100% opacity erases pixels completely, 0% does not erase at all. 50% is semi-transparent (or coloured). Opacity is not available in block mode.
Flow: Determines how quickly the erasure is applied by the brush. Lower settings produce a more subtle effect. Only available in brush mode.
Airbrush: Use the eraser as an airbrush. Only available in brush mode.
Erase to History: Erases to a saved state or snapshot of the image. To use this feature, click the left column in the history palette next to the desired state.
Background Eraser Tool
The background eraser tool allows you to remove the background colour from an image or layer. When you click the image, the eraser samples the colour at the centre of the brush and erases this colour as you drag. Options in the toolbar allow you to specify the type of erasure, colour tolerance and sampling method.
Magic Eraser Tool
The magic eraser tool erases all colours within a set tolerance. This is essentially the same as using the magic wand and hitting Delete. Using this tool you don't need to drag just click once.
Photoshop History Brush
The history brush uses a previous state or snapshot of an image. The tool makes a copy of the image as it was in a previous state, then uses the content of this copy to paint with.
Example
The example on the bottom shows the history palette of an image. Three things have happened (i.e. there have been three states):
1. The image was opened.
2. The levels were adjusted.
3. A glowing edges filter was applied.
In the left column of this palette there is a selection box next to each state. Click a box to select that state. By default, the selected state is the point where the file was opened or created.
Painting with the history brush tool will add content from the earlier state like so:
Photoshop - The Brush Palette
The small icon located on the tool bar hardly does justice to the tool when compared to the actual brush palette. Access the brush palette located toward the top of the program. Single click the brush tab to activate the brush palette.
The palette is organized into a two column table with preset brushes on the right-hand side and several brush stroke options on the left. At the bottom lies a preview that should give you some idea of what your brush stroke will do. The brush palette is essentially the ultimate control panel for your brushes. Anything and everything can be adjusted with the brush palette.
Photoshop comes with several brush pre-sets. Later we will discuss how to create your own unique brushes but for now scroll through the preset brushes and when you come to the bottom, there's still more hiding from your view. To access them, click on the little black arrow located at the top of the palette near the actual Brushes tab. A navigation list should pop into view and at the bottom of that list lies about a dozen brush sets.
Browse through them, familiarize yourself with this palette, and finally pick a brush to paint with and paint away on a new layer.
Previously we sort of ignored the left column of the brush palette. Customizing brushes is accomplished here. Simply checking one of the boxes here modifies the brush in some way. These options are a way to fine tune brushes and can really bring about some impressive results.
If the scatter option on your brush isn't already on, click the check box to activate this option and then click the text to highlight the option and bring the palette into fine-tune mode.
Here we can adjust the amount of scattering that takes place along with the jitter and fade options. All really neat features available through the brush palette.
Photoshop - Create Your Own Brush
As you begin to "fiddle" around with each and every option available, you may want to save your brush as a preset for later use. Finalize all your options and settings then click the "Create New Brush" button at the bottom of the brush palette. Photoshop comes back with a prompt of what to name your brush. Type in a name and then press "OK".

Wingedge- Admin
-

Number of posts : 53
Age : 40
Name : Sir Francis
Year : Instructor
Registration date : 2008-06-17 -

it19 :: Lessons :: Photoshop Lessons
Page 1 of 1
Permissions in this forum:
You cannot reply to topics in this forum|
|
|